If you have a Gen 1 System, to use the skybox is a little different.
First make sure that your BMS is compatible. To do that, take a look at these:
NOT COMPATIBLE GEN 1A

BOTH BMS ARE COMPATIBLE/ GEN 1B & C
We must first clear an error 20 from displaying. To this, please turn the individual battery modules off.
Once that goes away, follow along with this.
You should have a longer RS232 cable, in order to push the upgrade to each individual battery manually.
First, connect the skybox:
- Connect the RS232 cable end labeled 'C-Box' to the RS232 port on the Skybox.
- Connect the RS232 end labeled 'Mate-Master' to the RS232 Port on the BMS
- Connect the RS485 end labeled 'C-Box' to the RS485 port on the Skybox
- Connect the 'Mate-Master-COM' end to the COM port on the BMS
Now, we must connect the power source. To do this, it is a little bit different.
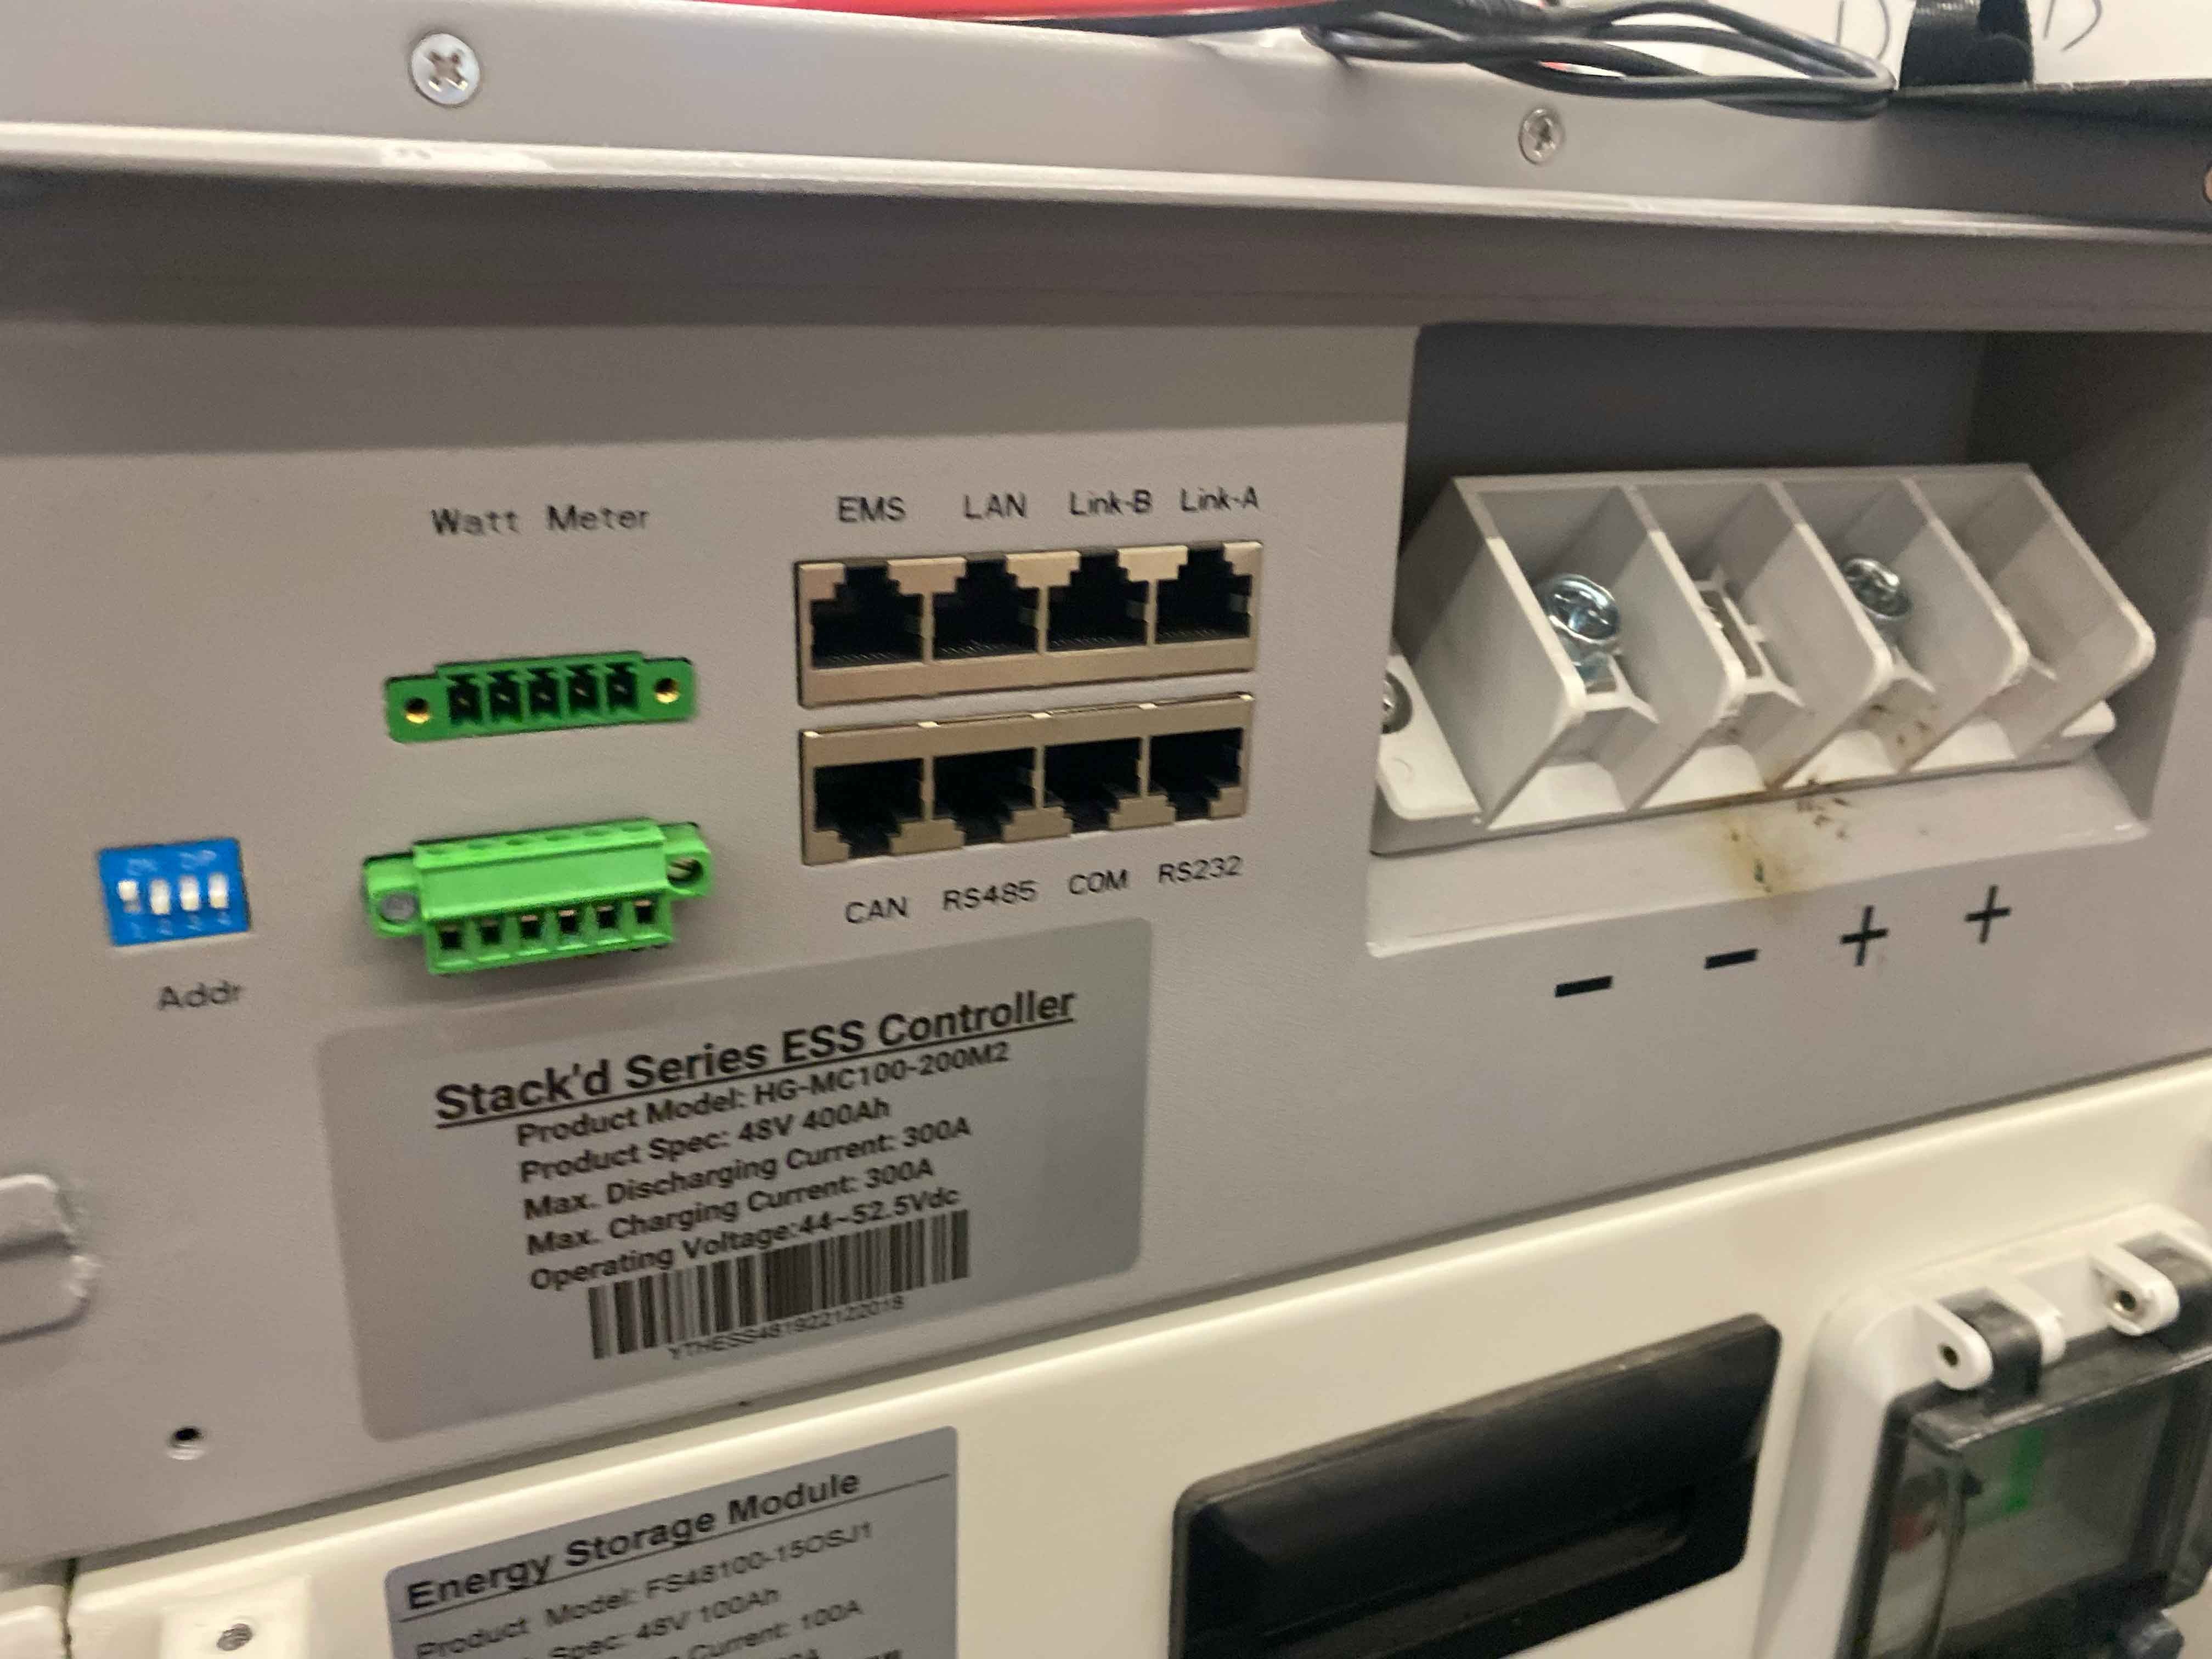
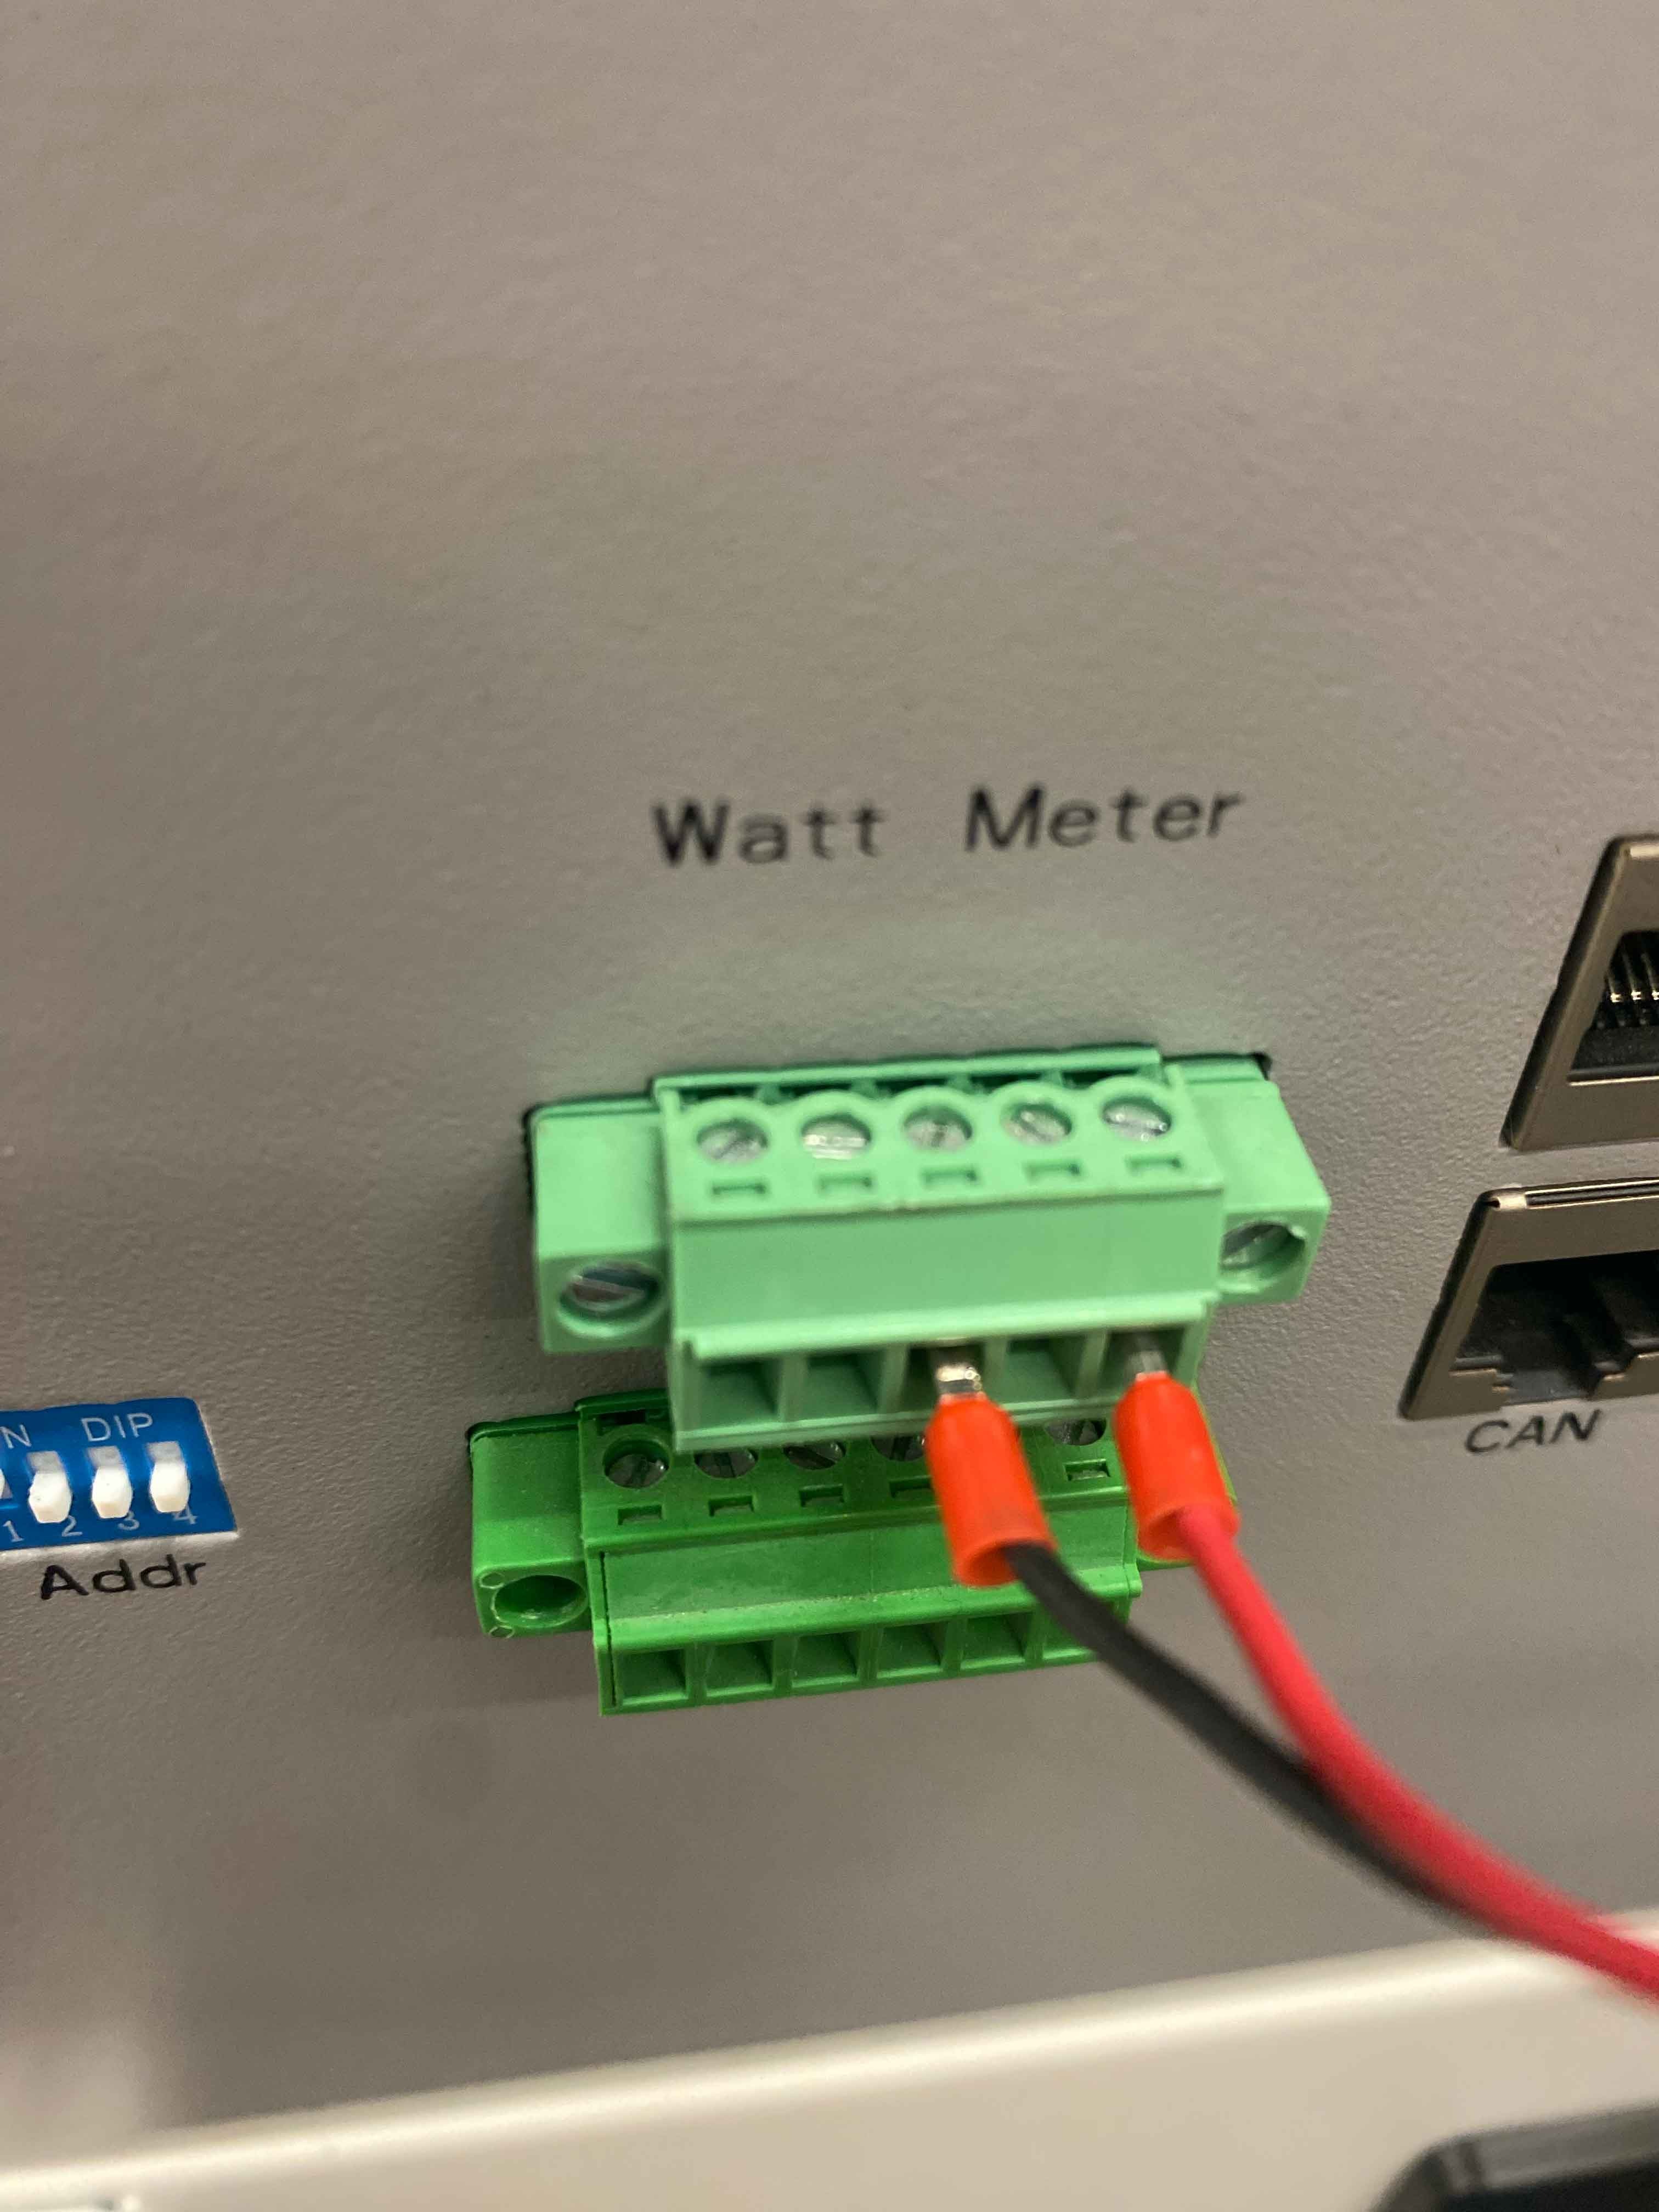
On the GEN 1 BMS, you need to take the first dry connector (the green one) and remove it from the BMS. Because we're going to use it like in the picture below.
Take the positive and negative cables that come with the skybox connector and transfer them to the 5-pinpin connector like this.
Negative (black) goes in pin 3.Positive (red) goes in pin 5.
After hooking it up, you will get a blue light on the skybox indicating that it is doing an update. Once you know that it is done, you will hear a 5 second long beep. That is how we know it has finished.
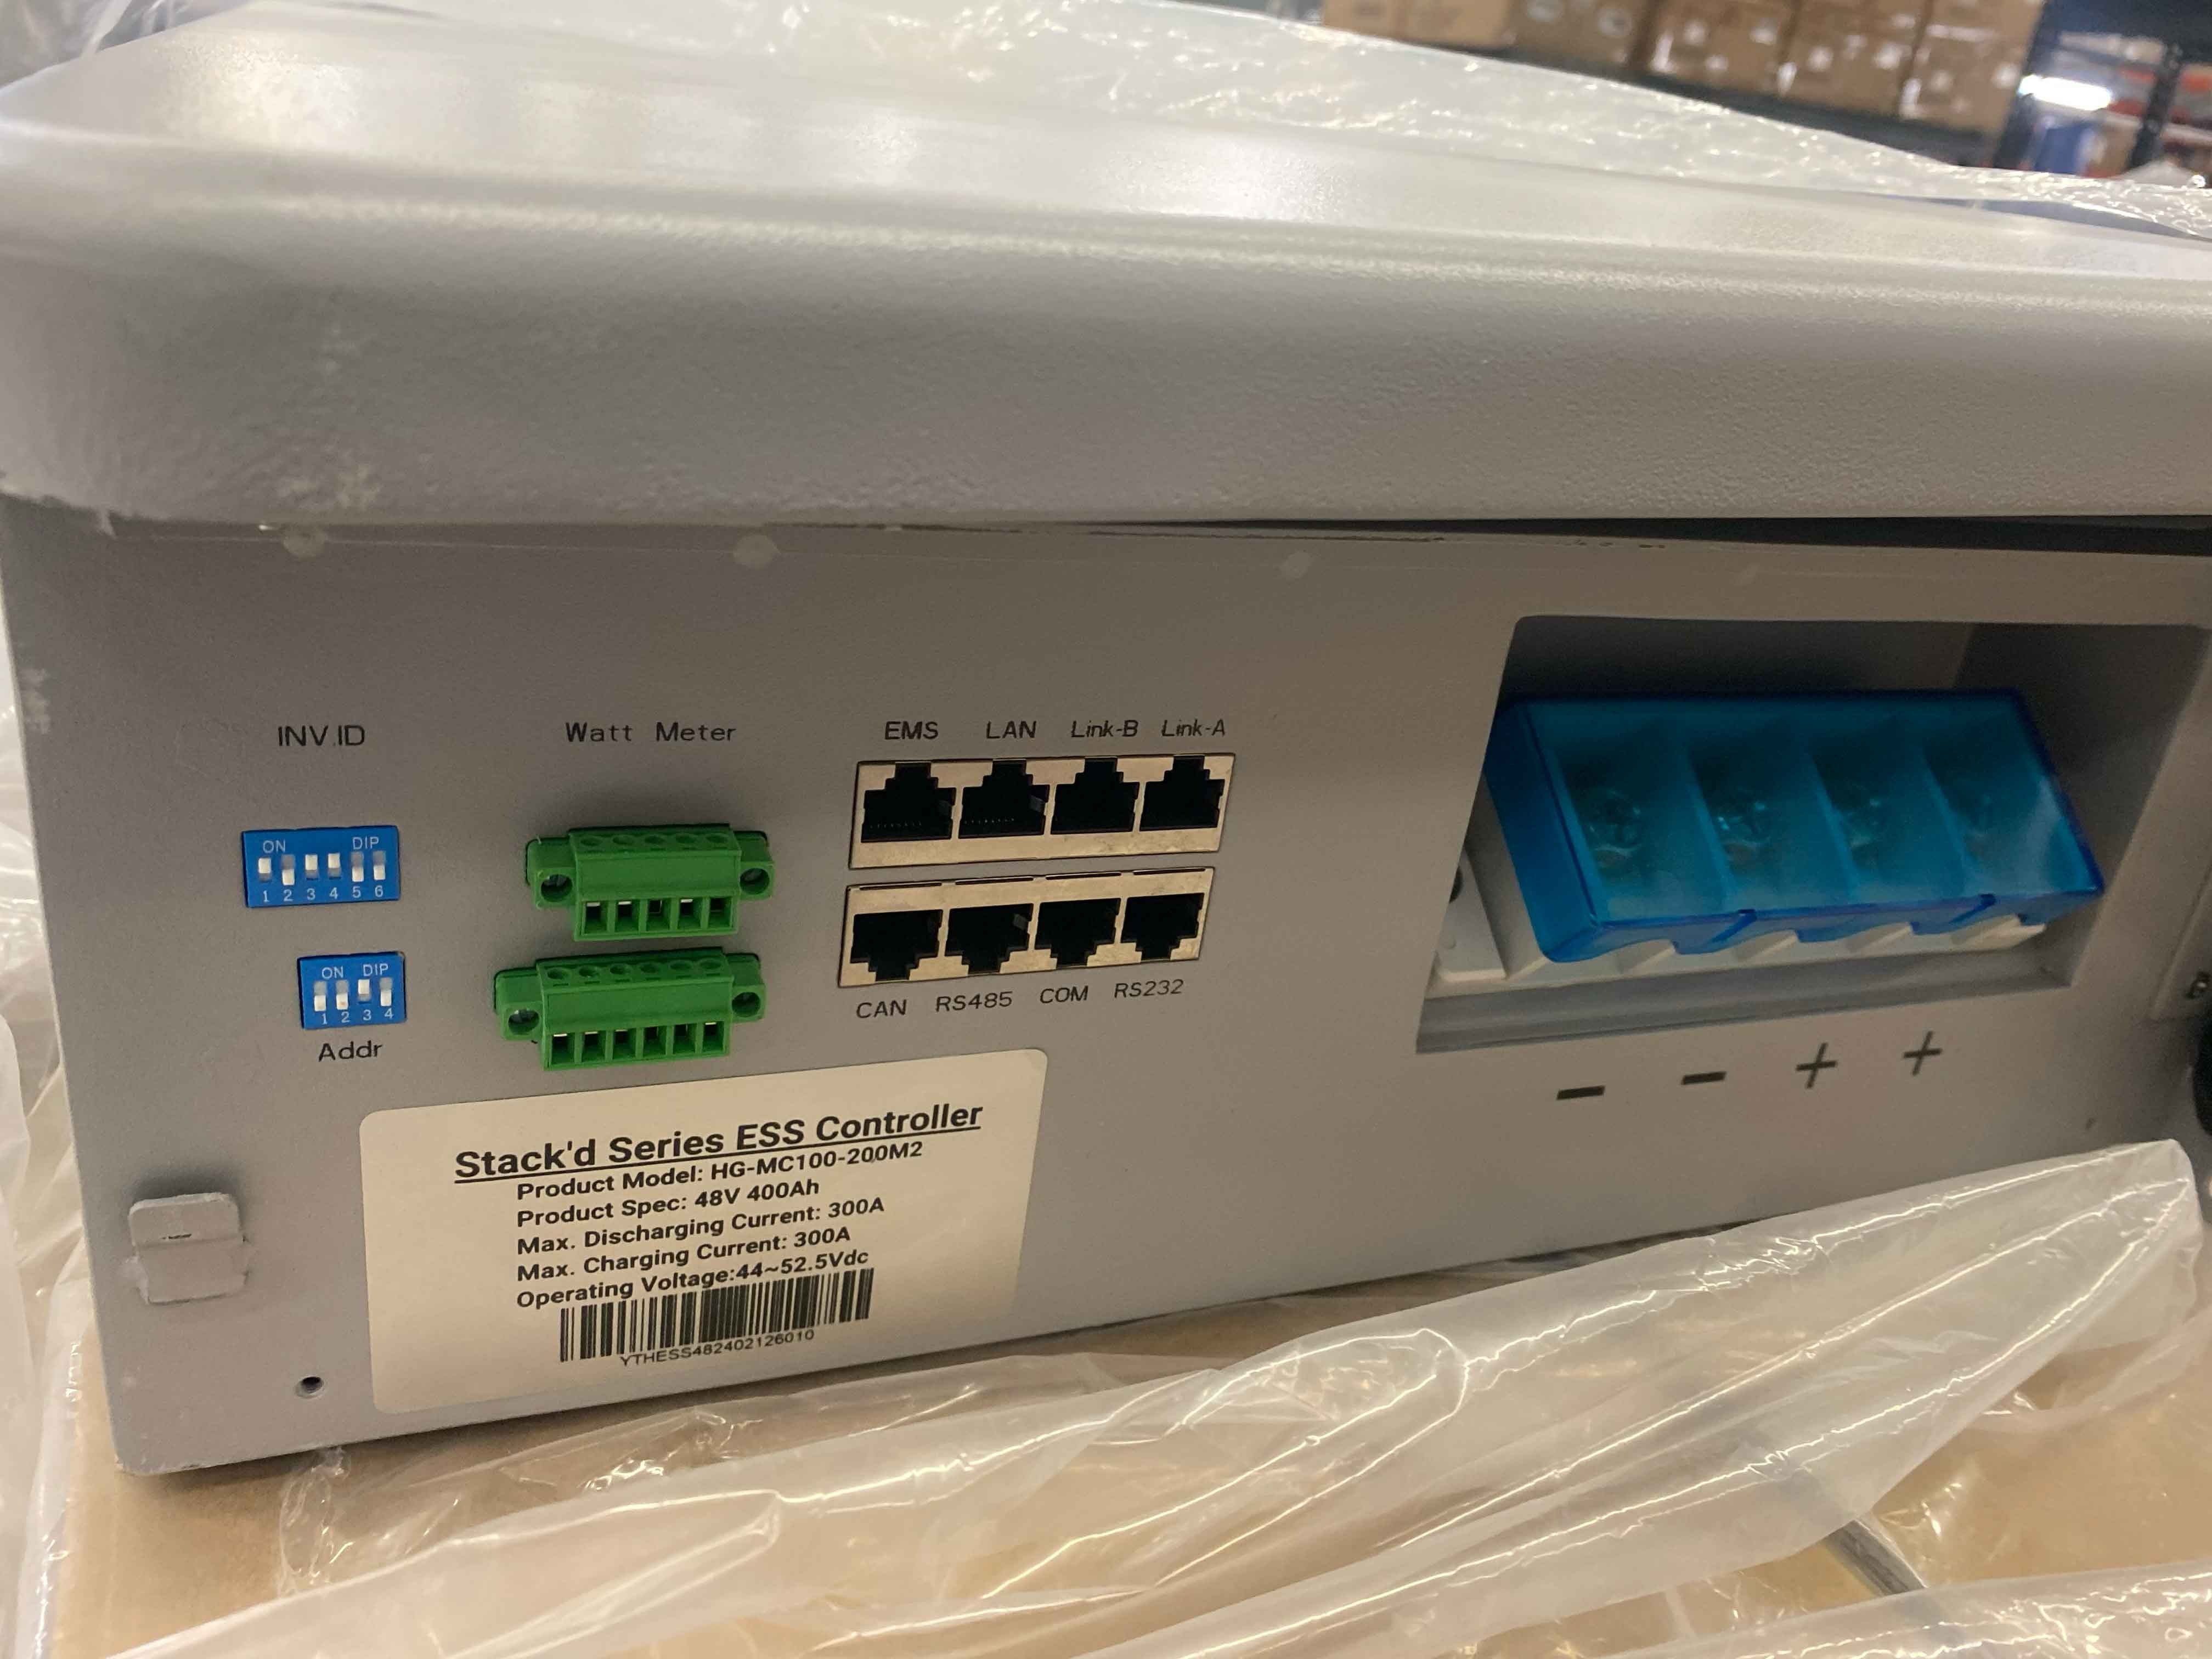
When that happens, you need to take the RS232 cable and disconnect it from the BMS and connect it to each individual battery, like shown in the image below.
You will have to do this step with each individual battery module.

If it does not show the blue light flashing immediately, press this button once (PLEASE DO NOT HOLD IT LONGER THAN 1 SECOND, BECAUSE IT WILL DELATE THE FIRMWARE IN THE SKYBOX).
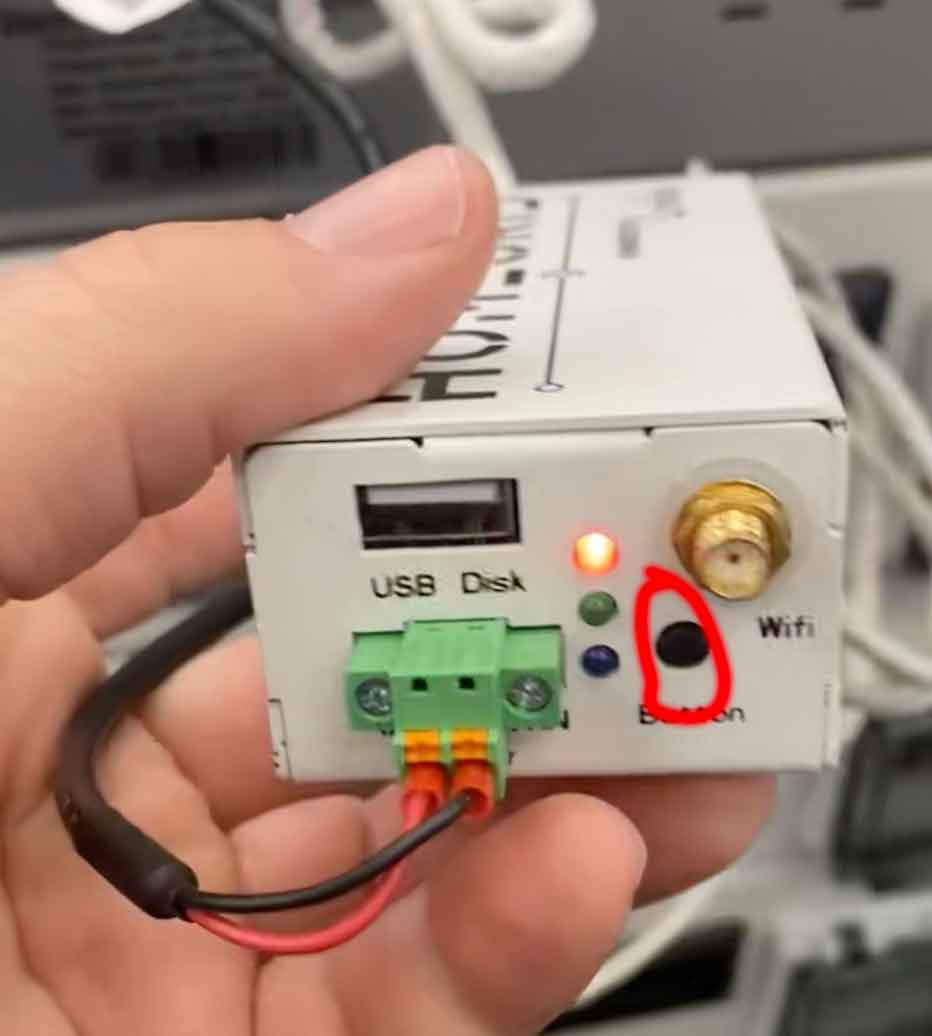
After doing that, it'll start showing the blue light. 
When it is done, you will hear the 5-second-long beep again. That's how you know it is done.
Do this with all of the battery modules you have.
If you have any questions, please reach out to the HomeGrid Support by phone or email.
Was this article helpful?
That’s Great!
Thank you for your feedback
Sorry! We couldn't be helpful
Thank you for your feedback
Feedback sent
We appreciate your effort and will try to fix the article