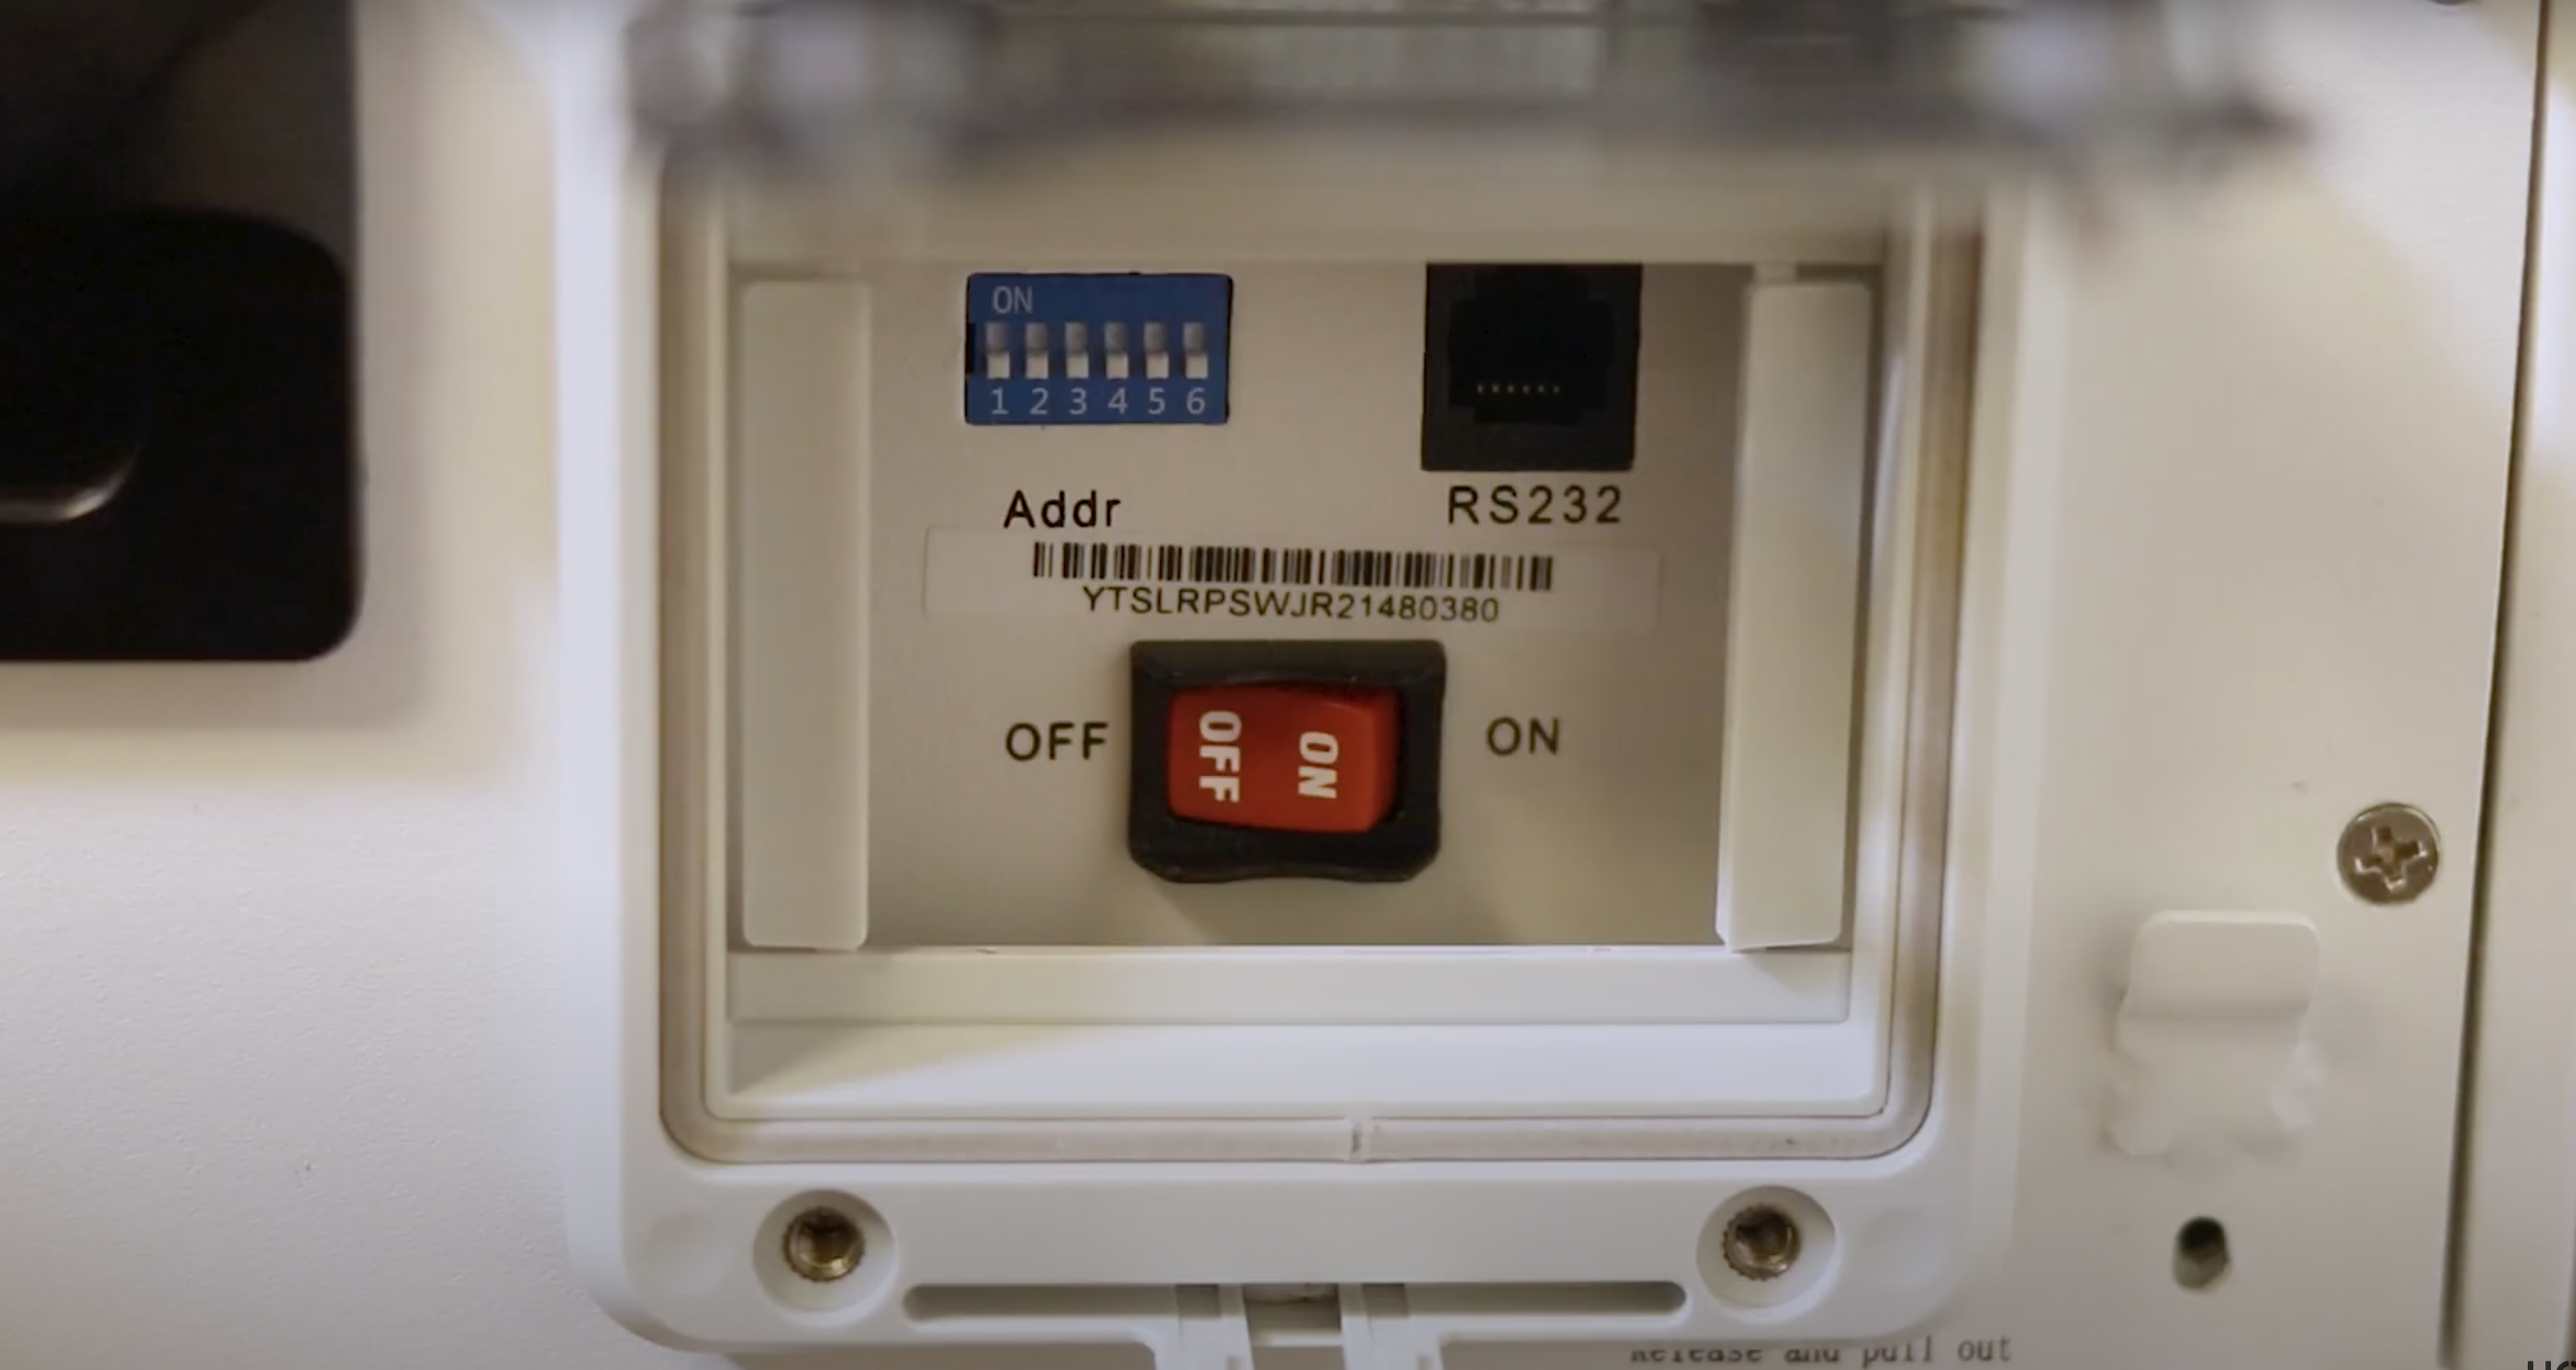
How to Know when a Module is Dead
A module is dead in either one of these circumstances:
- Module switch is ON, but the green light is OFF
- Module switch is OFF, but the green light is ON
- Module switch is ON, but it has a red light
Another good way to know if a module is dead is if the voltage is below 43V.
First you will need the software to "Unbrick" the module.
Need to Install the Software?
If you haven't installed the software, please follow the instructions up until the "Upgrading The Modules" section on how to do it here in this article:
https://lithionbattery.freshdesk.com/a/solutions/articles/73000596178
When you are done with the software installation, please come back to this article.
Unbricking the Module
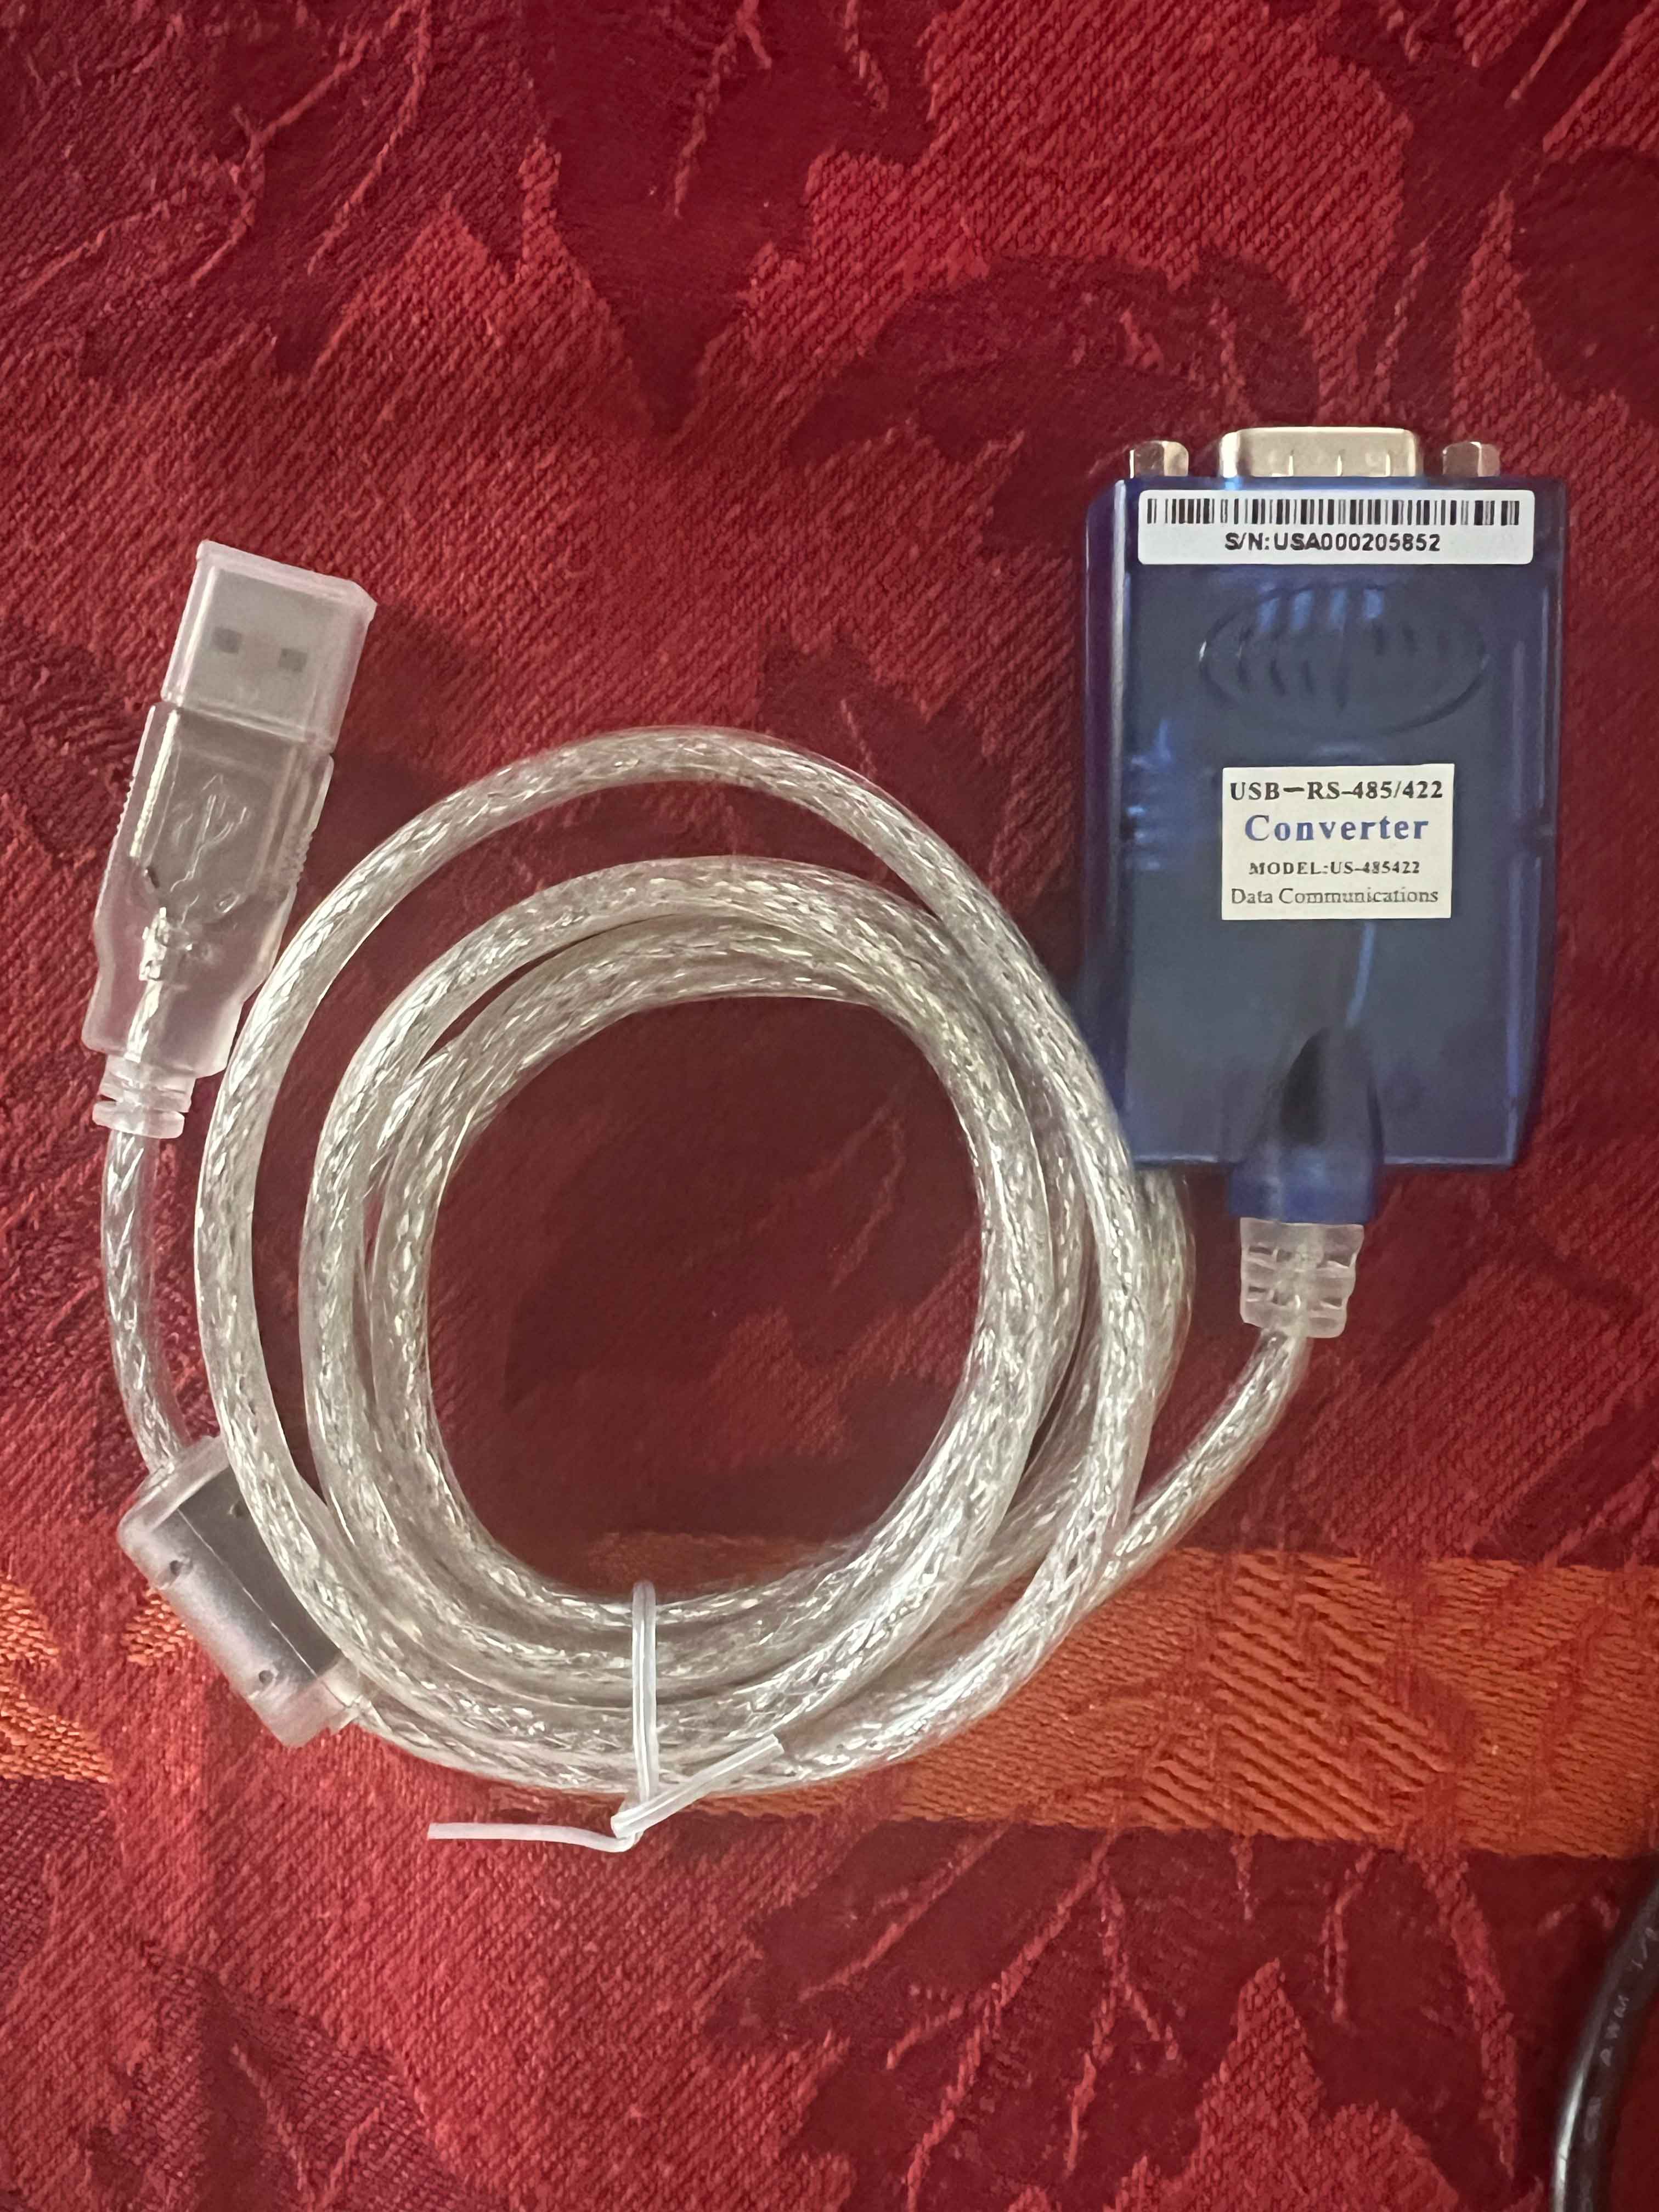
This is what you'll need to unbrick it:
The Project 1 application found in the 3COM_IAP2.6 folder

The "Unbricking Tool"
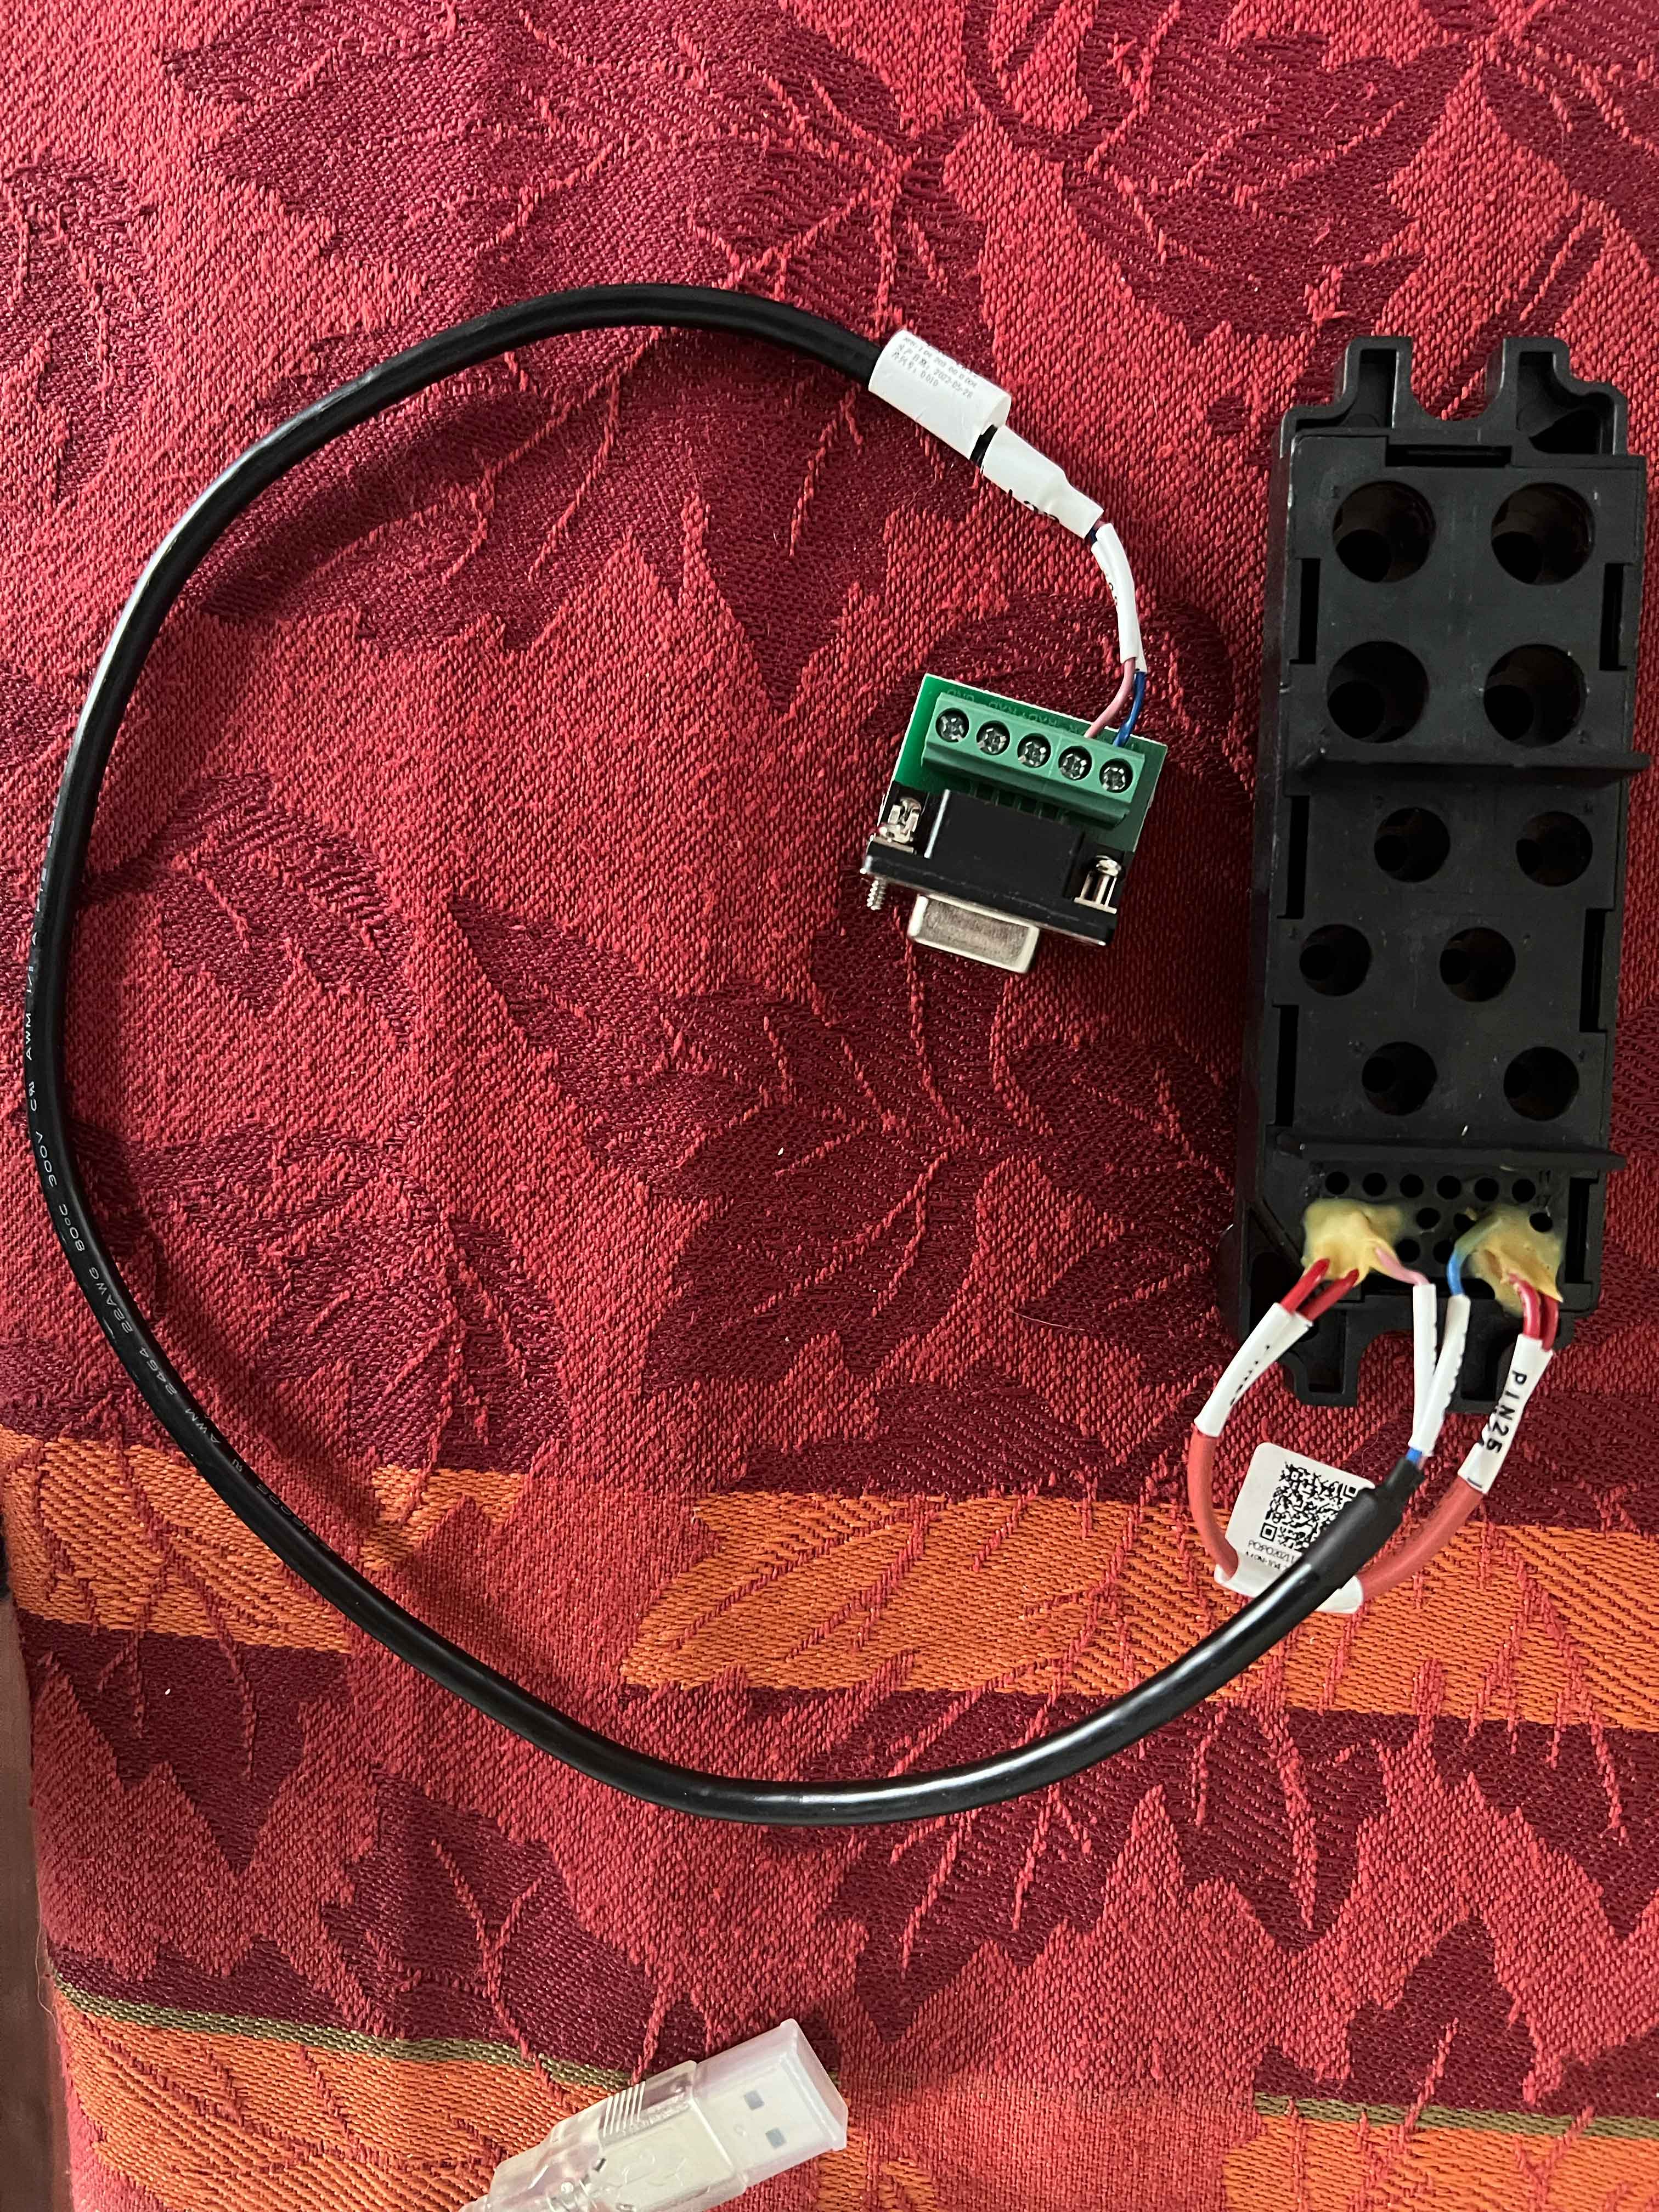
This is what it looks like when it's all connected

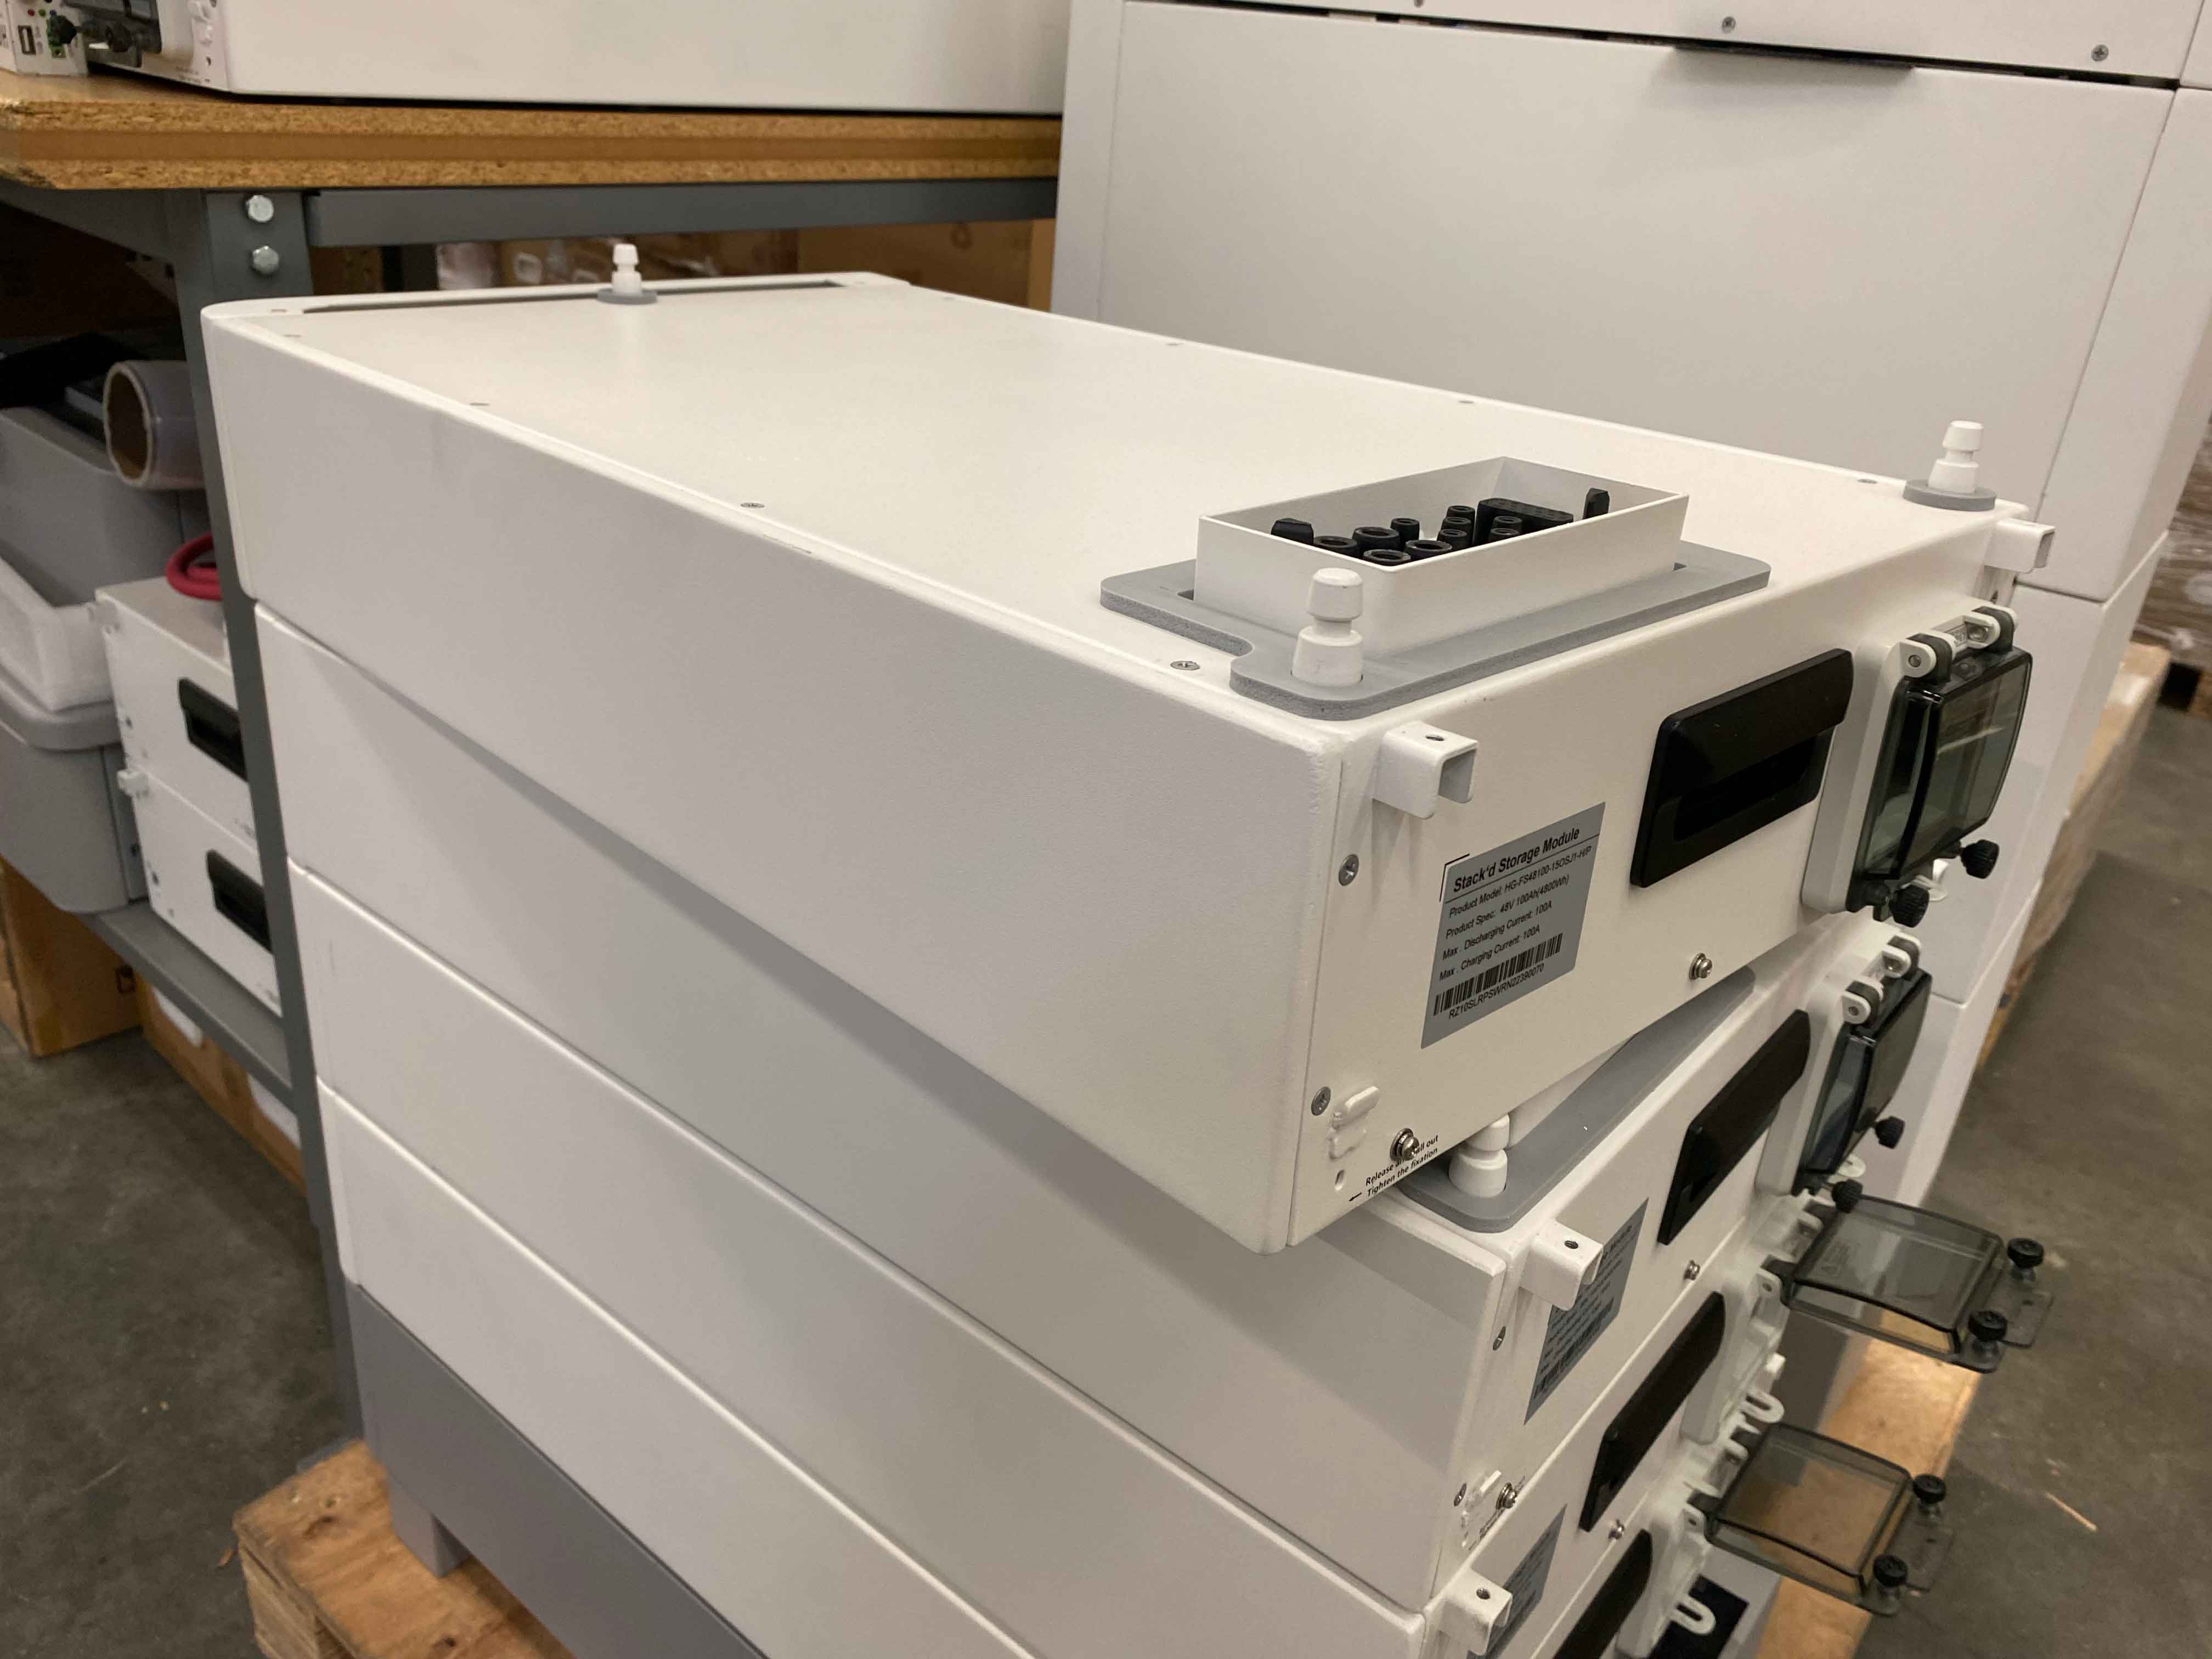
Once we have all of that, we need to take the battery that is dead off of the stack. Nothing can be connected above nor below. Like this:
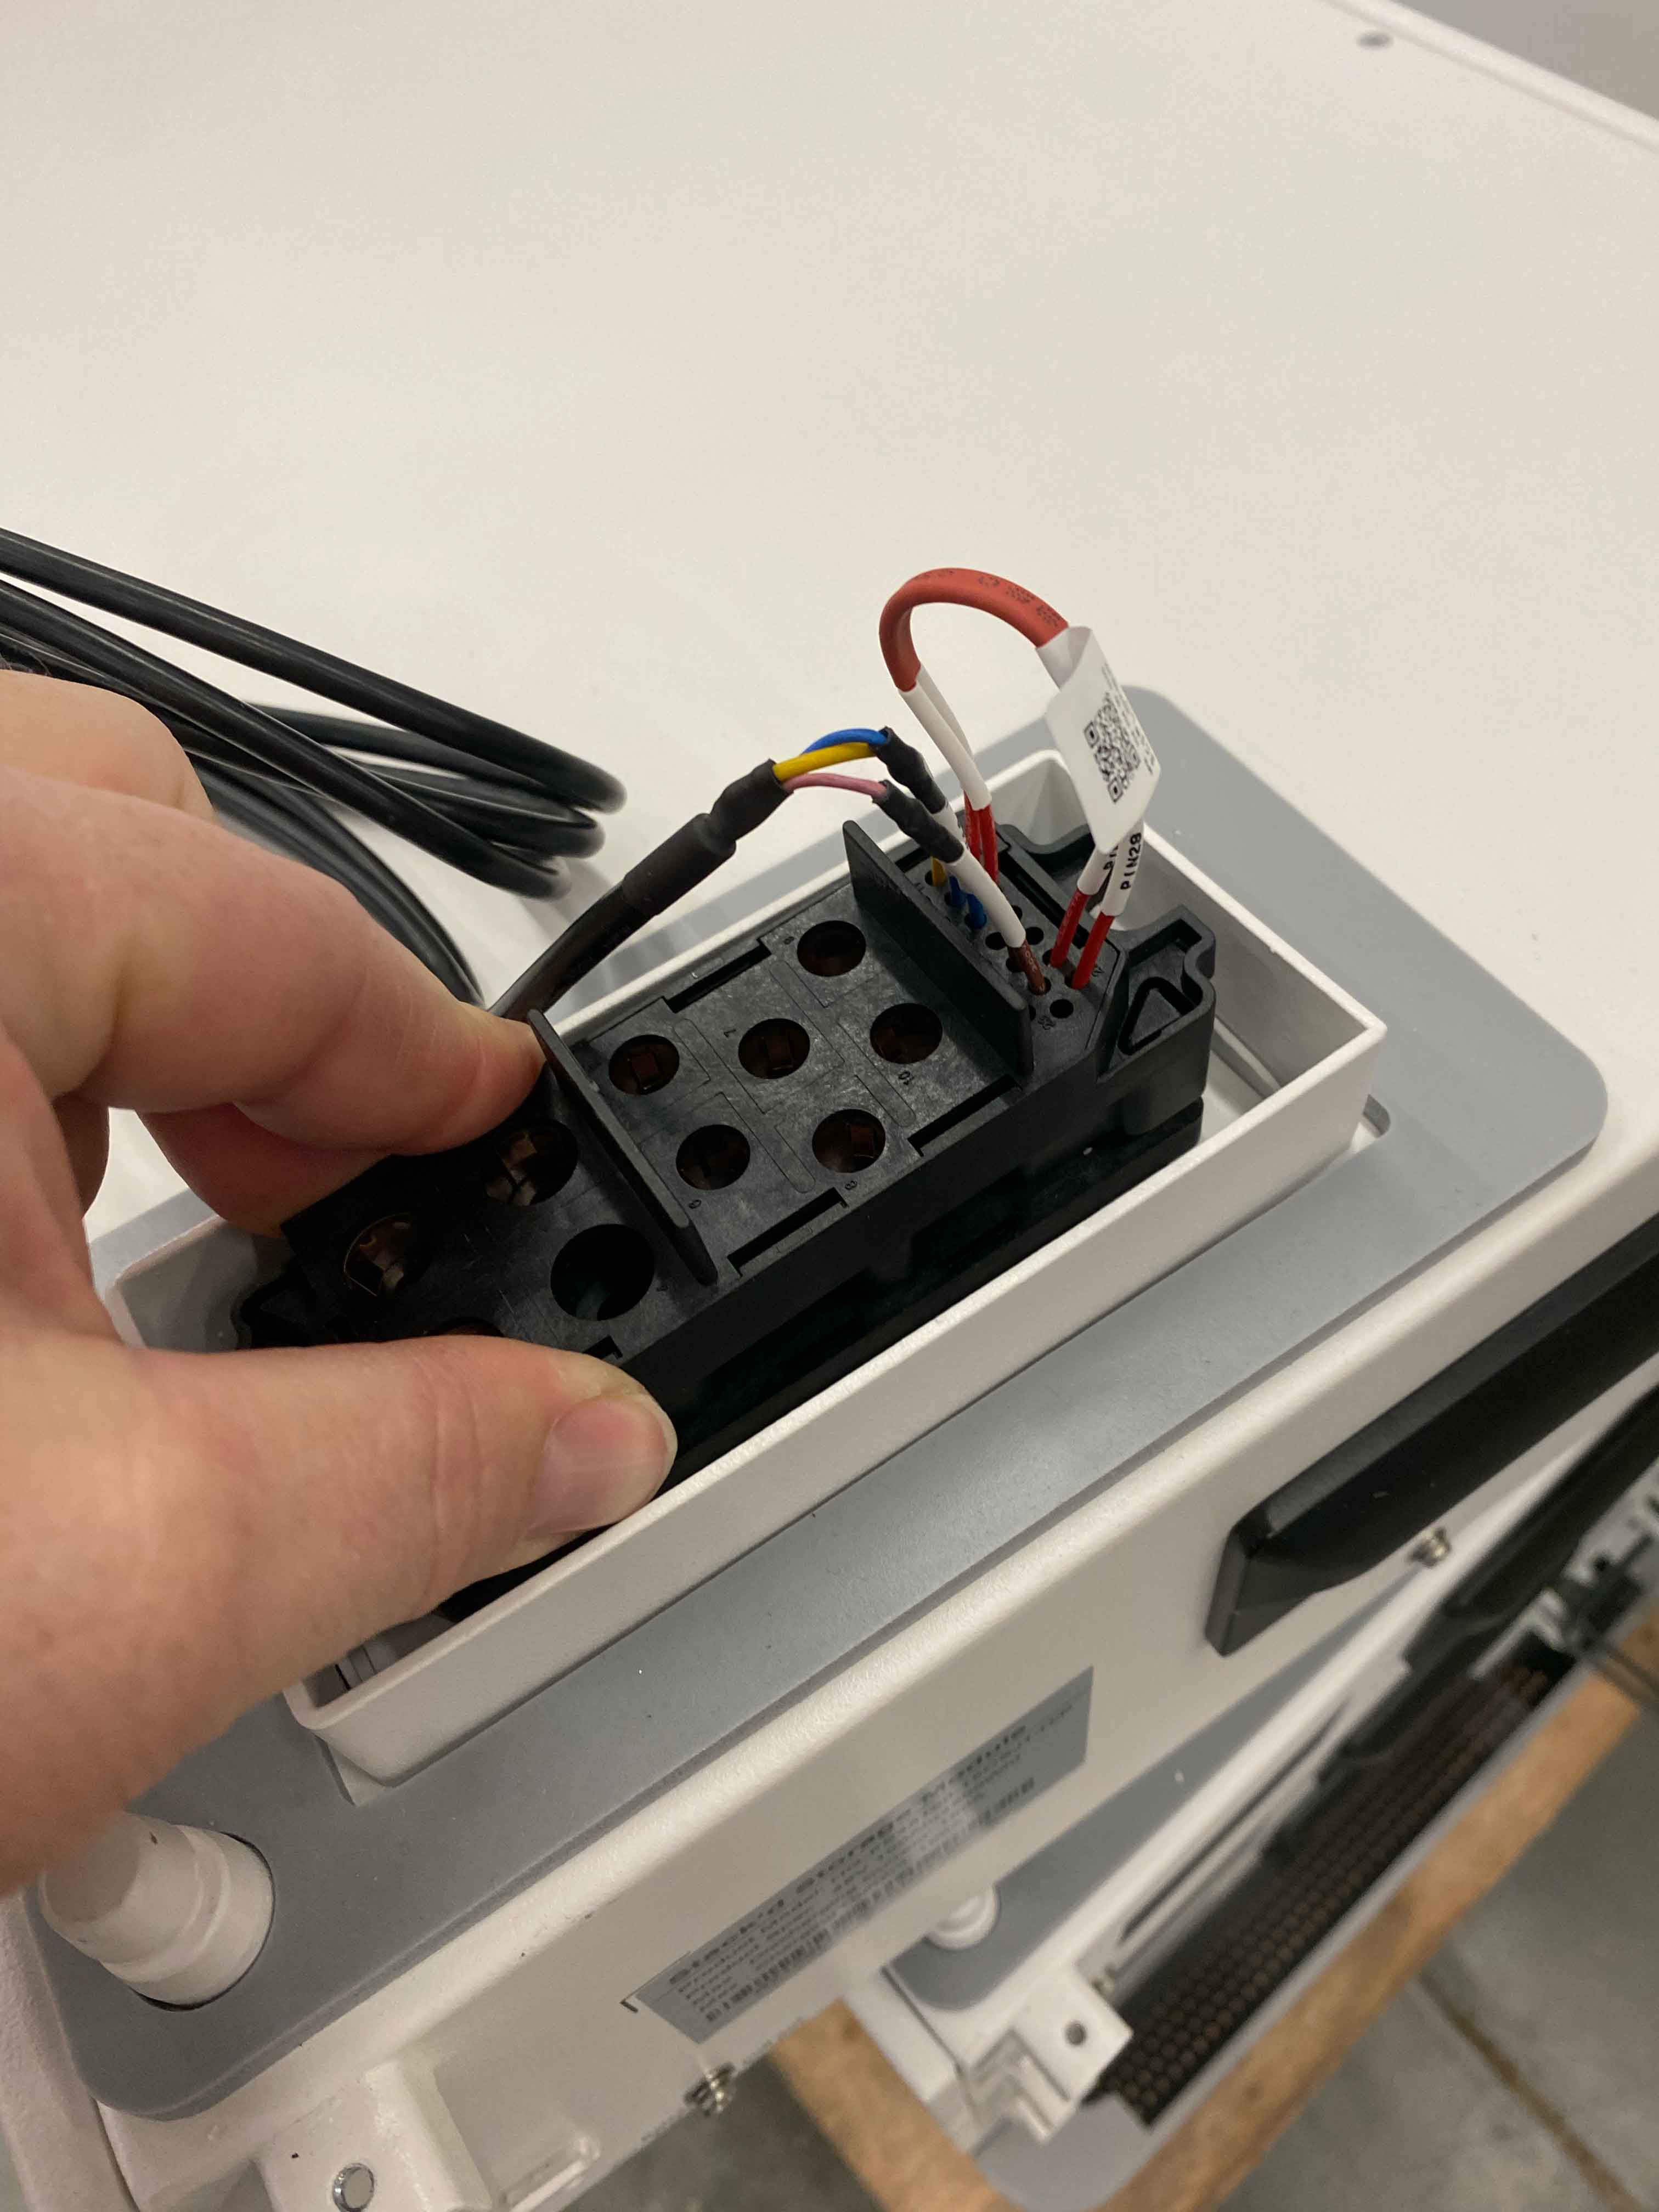
Once we have the battery isolated, we connect the unbricking module to the computer using the USB end. Then the plastic black connector goes on top of the battery like so:
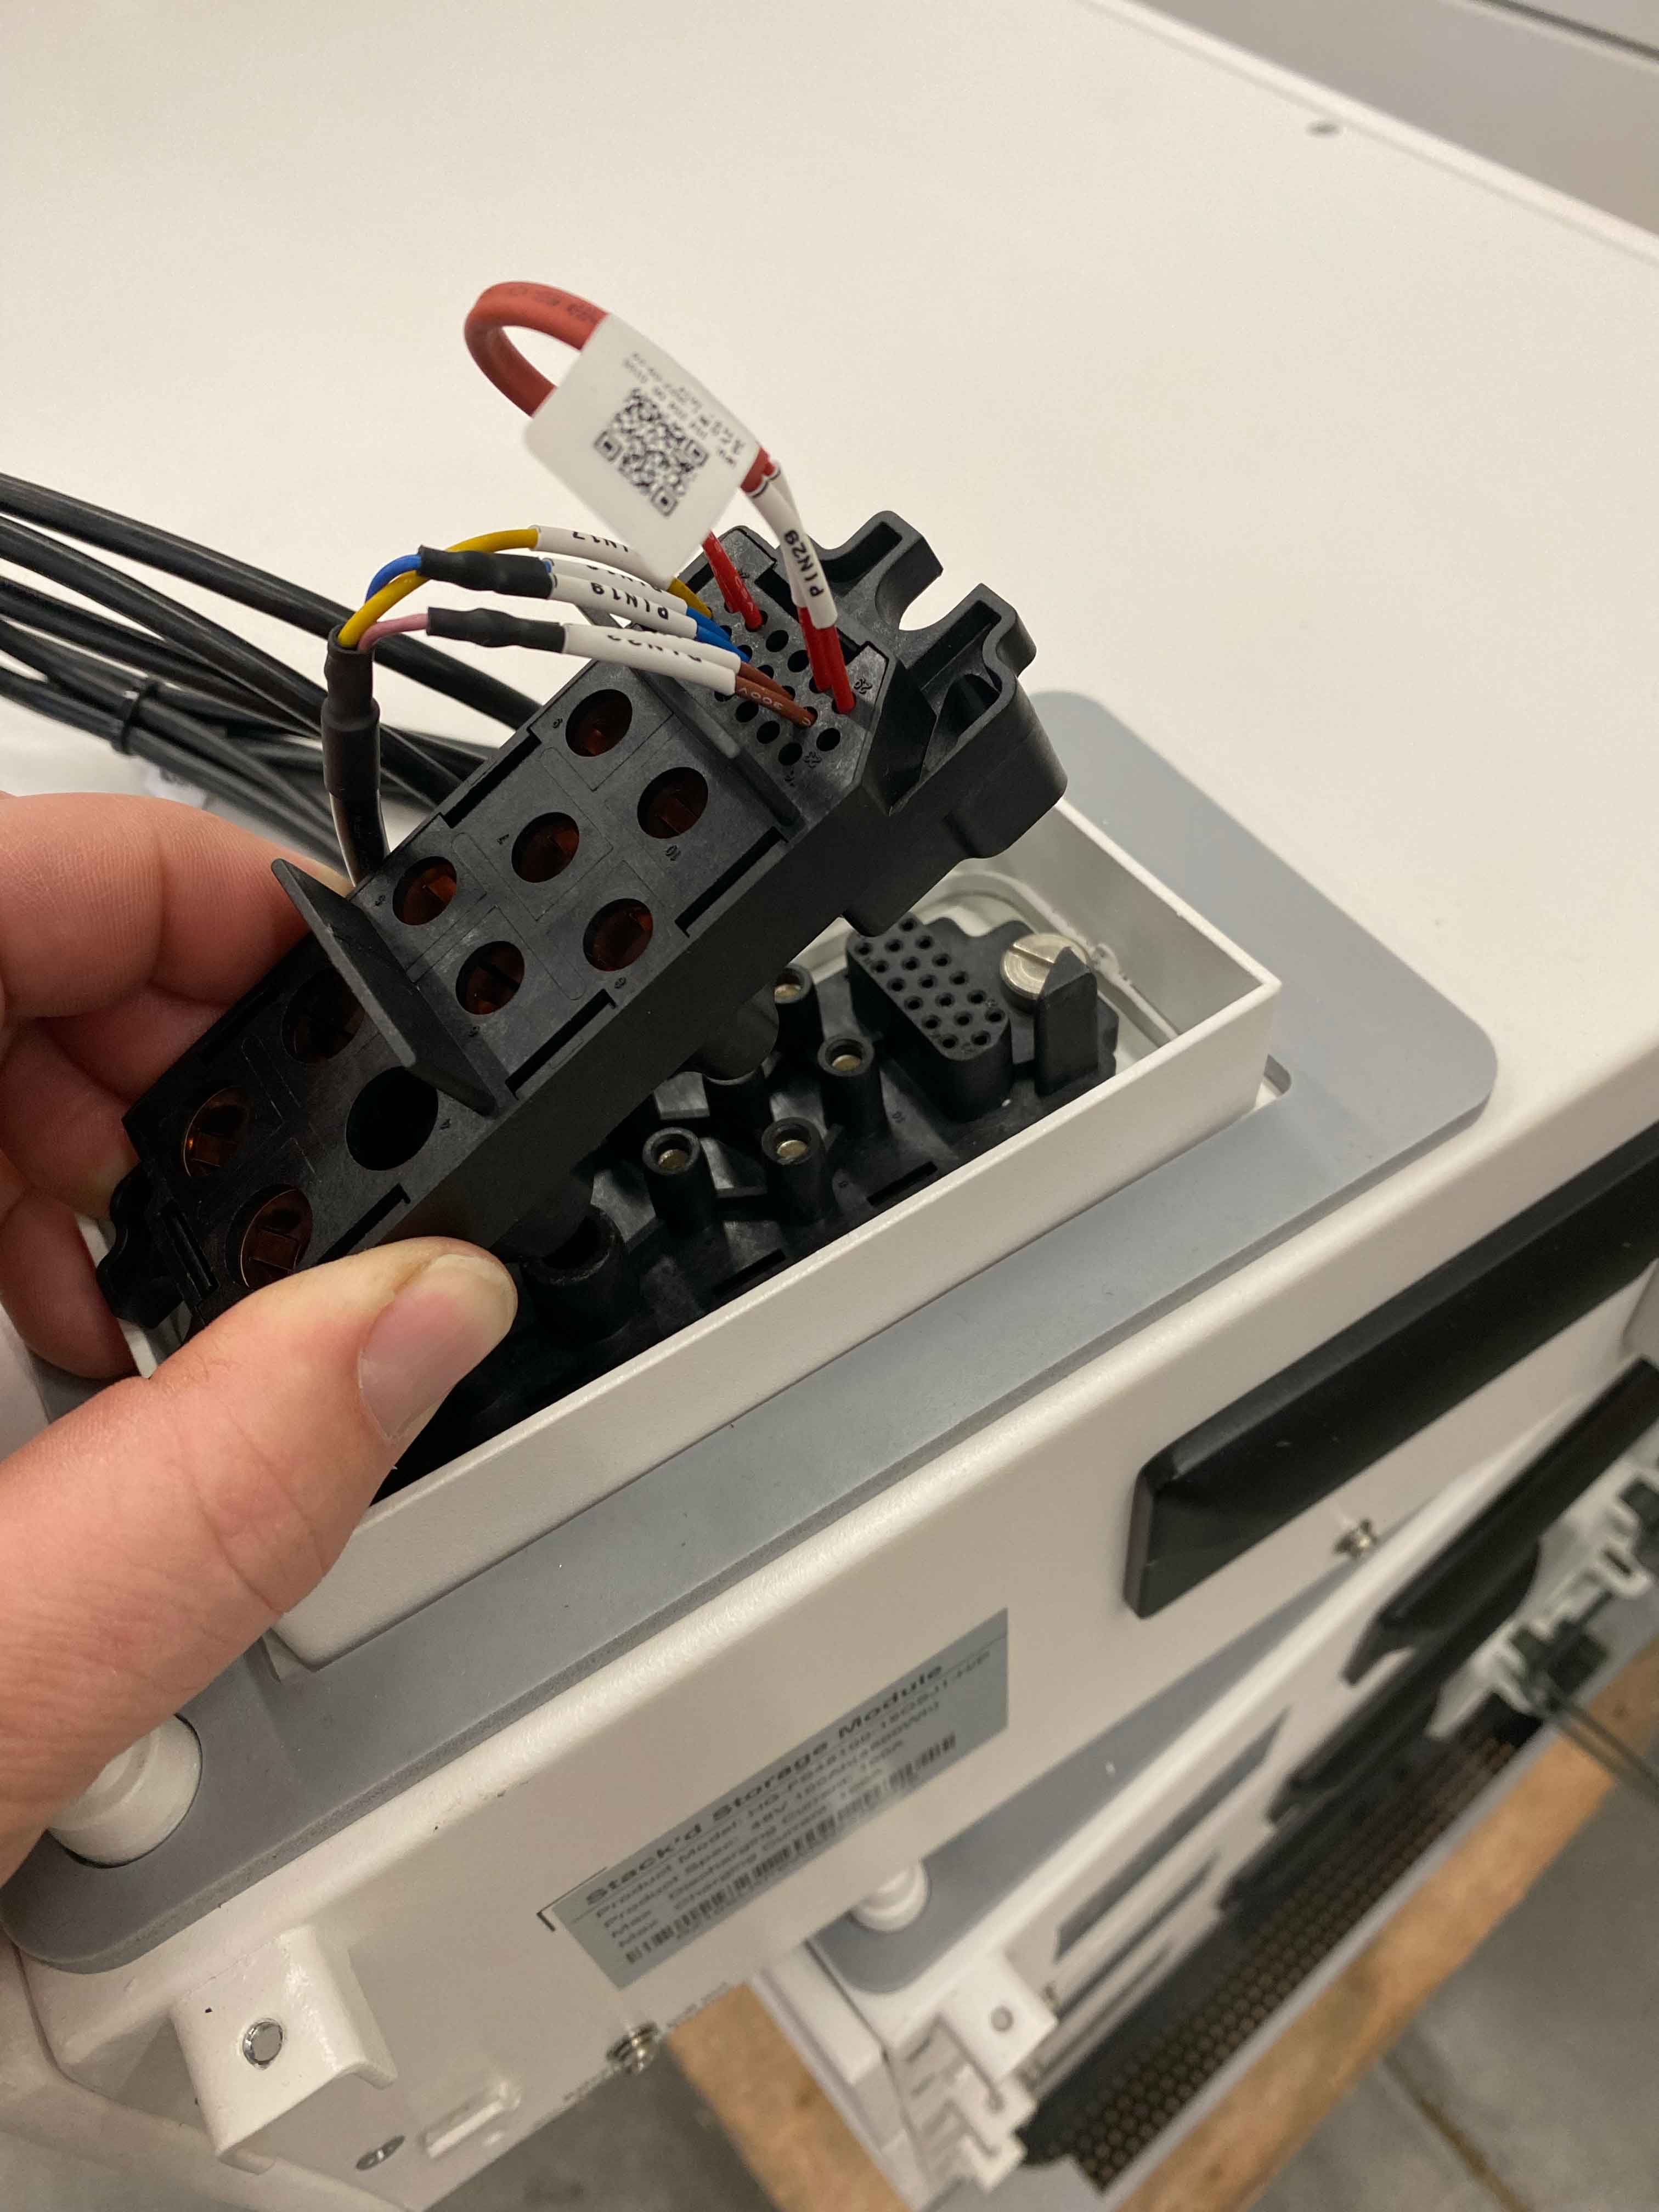
One thing to make note of is that this end:

CANNOT go all the way in YET. There needs to be some space between the pins and the connector. We will go over that in a moment.
Make sure the battery is off.
Now, with the software, we make sure all of the settings are correctly placed:
When you open the Project1 app inside the 3.COM_IAP 2.6 folder, this is what shows up:

When the Unbricking tool is plugged in and we have the driver installed (the RS485 driver), we select the COM port dropdown and select whichever COM shows up:

Select the firmware for whichever Gen (2 or 3) module you are updating. If you put the wrong firmware on a module, it will not work. If you do not know how to check, use EMS Tools or the Serial Number spreadsheet -- or call us at 725-373-5350 to verify.
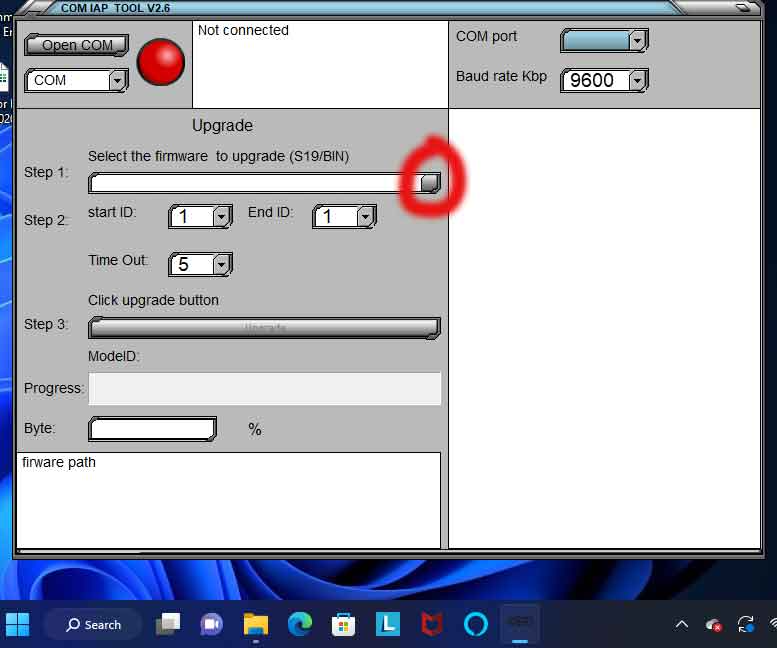
Select the firmware for the appropriate module -- Wherever you have downloaded it to. If you do not have the firmware, go here:
https://www.homegridenergy.com/resources
Go to Latest Firmware -> Stack'd
Once you have selected the appropriate firmware, select the "??(O)" button.

We click on Open Com and leave the start ID and end ID the same, because since it's only one module, that's all we need.

Time to Unbrick
This is the part that needs a little bit of extra attention.
When you hit the Upgrade button on the app, you must wait just
under a second and fully push down on the unbricking tool to
the serial port.

+
If you timed it right, you will see the progress bar. If you did not, it will say failed.
Keep trying it until you get the progress bar.
Once The Update Finishes
Turn the battery on and if the light turns on, it means it worked.
Another test is to put the battery back on the stack and put either another battery on top of it or the BMS. If it turns back on, then it worked.
If you did the whole process and it worked properly, and you put the battery back on the stack put another battery on top or the BMS and it did not turn on, you might need to replace the battery.
Please reach out to us.
Was this article helpful?
That’s Great!
Thank you for your feedback
Sorry! We couldn't be helpful
Thank you for your feedback
Feedback sent
We appreciate your effort and will try to fix the article